Our Tiny House Gets Doors and Windows
By Rob Pomazi
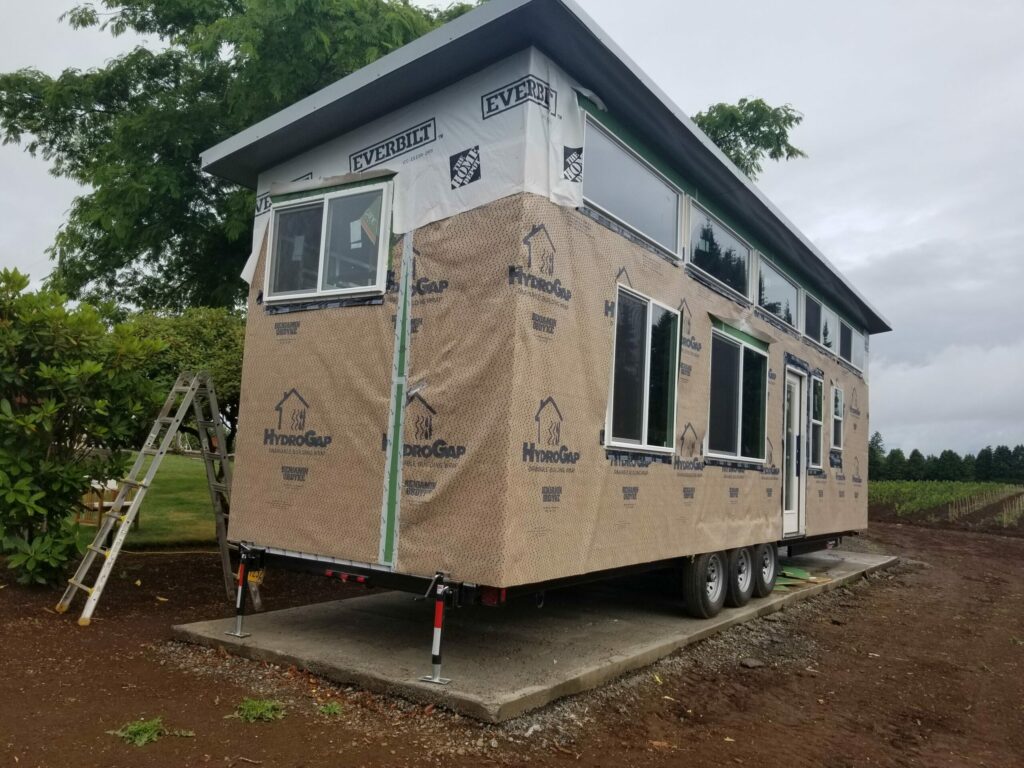
In this edition of our blog Tiny House Accessibility with Rob & Leesa, we will show you our tiny house after it gets mostly weather wrapped. Likewise we will show the progress of installing the doors & windows.
Using the specifications provided by our builder Thimble Homes, I placed an order with Discount Windows for the 11 windows and 2 doors that we needed. I ordered all of these about a month ahead of the scheduled delivery of our tiny house.
We are installing a stained glass window that has sentimental value. The circular stained glass window needs to be modified into a square window and framed as well, so it will consequently need to be installed after all of the other windows. Therefore, our next post will cover that task. Unfortunately, I didn’t deduct this window from the total windows needed so I ended up ordering an extra window. Better to have too many windows than not enough, so I guess it all worked out!
Cutting Out Window Openings
Before we can wrap the house, we need to cut out all of the window openings.
In totality, we have eleven window openings that need to be addressed, five of which were the 2′ high by 6′ wide upper picture windows. These windows span the entire east side of our tiny house. Consequently, we are given an amazing view of Mt. Hood!

Leesa also needs to cut the opening for the 3′ by 3′ stained glass window, which will be the only window on the west side of our tiny home.
Thermal Wrap


First of all, it’s really important to have lots of friends willing to help us wrap our tiny house. Fortunately for us, Leesa has an amazing friend, Pam, who is always willing to help! We also received a lot of help from my dad, Laszlo, and Pam’s son, Hunter.
Wrapping the house had a bit of a learning curve. We started at the bottom of the home and worked our way up.
Also, if you happen to staple into wrap over a window opening, the rip that occurs is fixable. Not that we ever experienced that situation 😉.
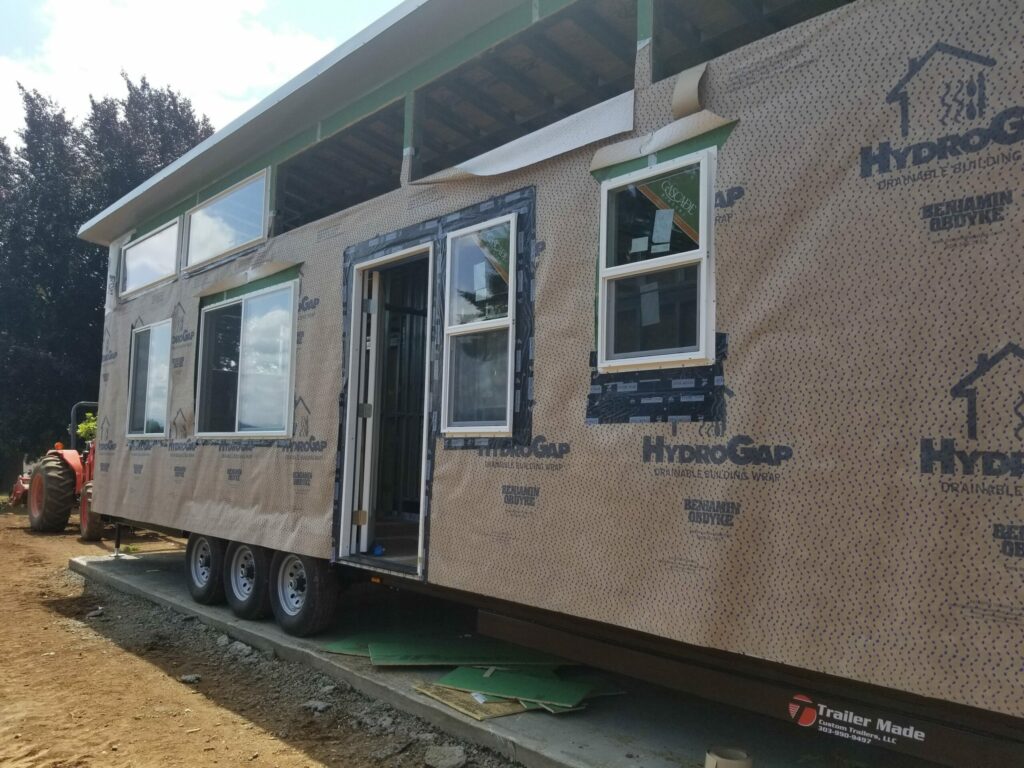
Some of the wrap above the view windows was applied after the windows were installed. Those images in the slideshow above were taken when siding was being installed. The siding installation will be featured in a future post.
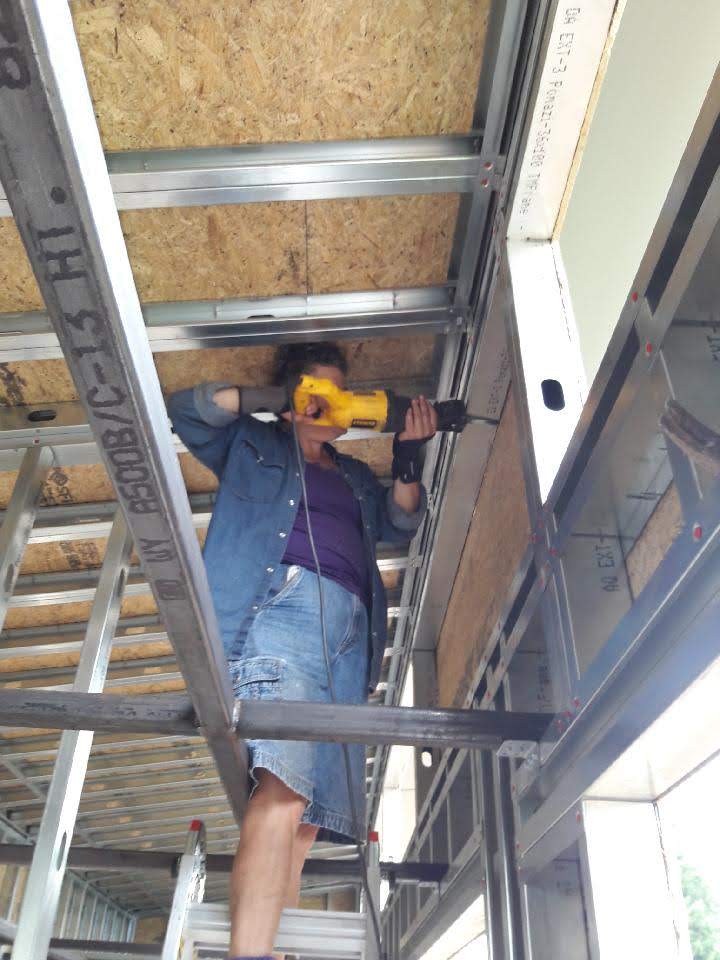
Installing the Doors and Windows
The most important factor, as emphasized to us by Luke at Thimble Homes is that framing being plumb is more important than framing being level.
Installing the windows and doors was a learning experience. We started with the small windows and worked our way up.
All in all, we have ten windows and two doors that need to be installed. Leesa was apprehensive but after watching numerous You Tube videos regarding how to install windows into a steel frame she felt a bit more confident.
The first window installed was a slider that is 4′ high by 2′ wide to the right of the front door.
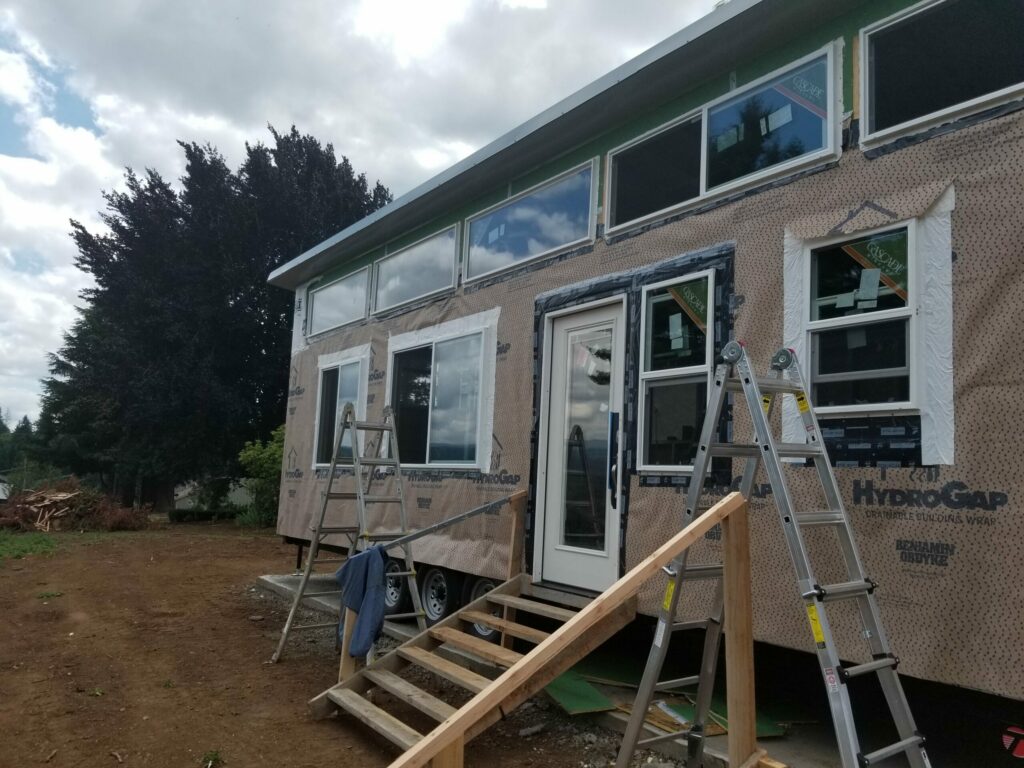
The next windows put in were the five 2′ high by 6′ wide upper picture windows. Fortunately a tractor with a pallet on its forklift made this a much easier endeavor.
One valuable lesson learned was that windows without sliders are pretty easy to install inside out. Lesson learned and corrected. Nothing like doing the same window twice.
After that the 3′ high by 2′ wide slider window for the kitchen was put in.
We then moved on to the bedroom area and placed the 4′ by 4′ south facing window.
We finished by installing the 4′ high by 2½’ wide slider on the east side of the bedroom as well as the 4′ high by 6′ wide slider to the left of the front door and across the house from where the stained glass will be hung.
Our tiny house has two doors, the front door on the east side, and the back door on the west side.
While installing the doors, it became a realization that everyone involved in the process needs to have the same philosophy. We will just leave it at that. Regardless, the free labor is greatly appreciated!
Weather Flashing the Doors and Windows
Leesa again watched several You Tube videos, this time on putting flashing tape around doors and windows.
The only real problem that we encountered was the flashing tape we started out with did not adhere very well to our house wrap. After checking google, we realized that we needed to use flashing tape recommended by the manufacturer of the wrap we used. We had no problems with adhering once we got the right tape!


Thanks for letting us share our progress with you! Stay tuned for our next blog where we talk about the stained glass window.
Have a great day and thanks for visiting!